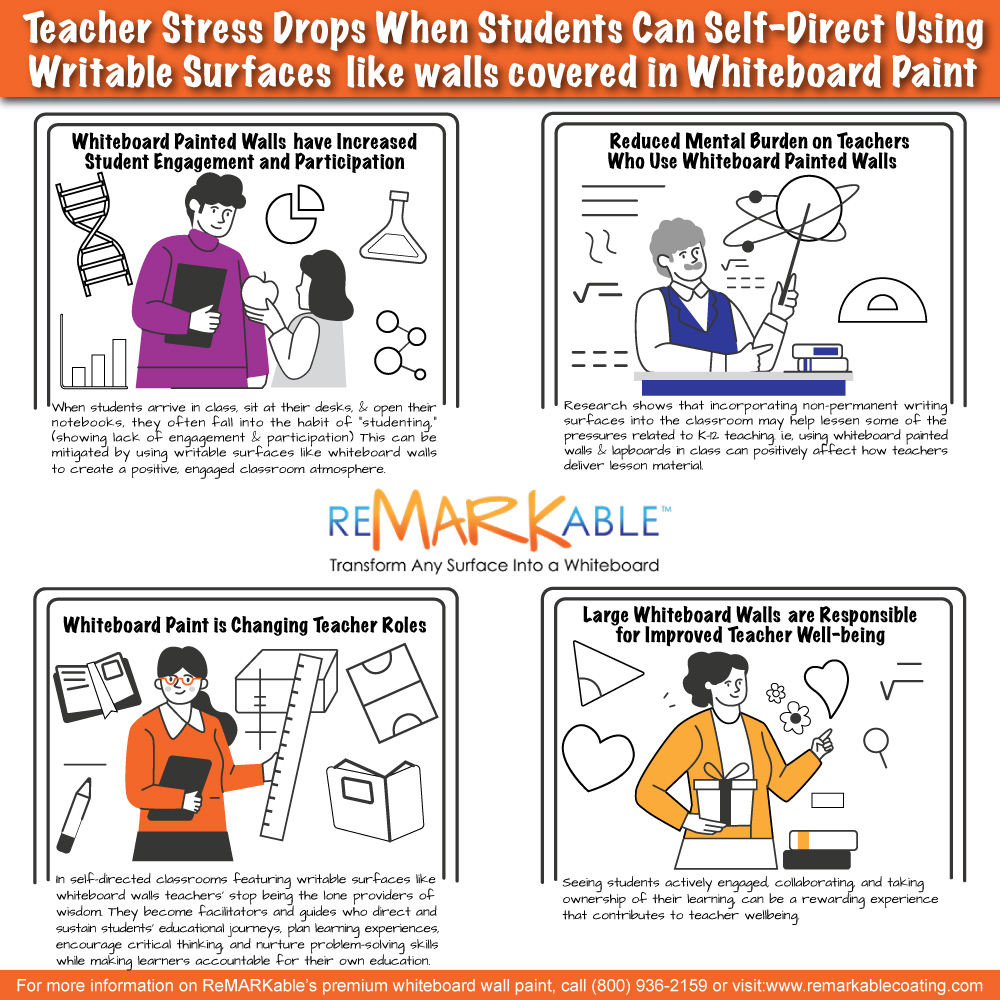
Cut wasted classroom minutes and boost instructional time. Writable walls coated with whiteboard paint reduce lesson transition time by up to 10 minutes per day—maximizing learning and minimizing disruption.
Writable walls aren’t just for student creativity—they’re a stress-reliever for teachers too. Discover how high-quality whiteboard paint surfaces empower students to self-direct and stay engaged, leading to fewer disruptions and less teacher burnout. A smarter classroom starts with a writable wall.
Dry erase walls are a remarkable feature for contemporary homes, offices, and educational spaces. By applying whiteboard paint, any wall or surface can be transformed into a dynamic area for jotting down thoughts, sharing ideas, and even establishing a monthly theme.
In this video is a collection of November-themed quotes that resonate with the quiet yet profound energy of the month. Whether you’re looking to add reflective thoughts, cozy sentiments, or reminders of gratitude, these quotes will help your dry erase painted wall capture the essence of November.
With a dry erase wall at your disposal, you can easily meet any and all of your time-management goals.
A high-quality whiteboard painted wall can be an incredibly effective tool to use for conducting daily time- and task-management activities, as it offers a huge open plane for creating a diverse range of schedules, timetables, and other time-management devices that can keep you on task throughout the work day and beyond.
Premium dry erase painted walls have a myriad of uses in elementary, middle, and high school classrooms, and among their most practical applications is in the teaching of vocabulary.
A dry erase wall can be your handiest classroom colleague as it stands right in front of you every day, waiting to be filled with new vocabulary words for your students to learn.
Premium dry erase painted walls have a myriad of practical and recreational uses and may be installed in a wide variety of settings. Most people think of dry erase walls as mainly being useful in business offices, schools, and universities, but these versatile writing and drawing surfaces may also be applied in other less frequently considered venues.
Premium dry erase walls are excellent tools to use in hospitals, clinics, nursing homes, and other medical facilities for managing staff-to-staff and patient-to-staff communications through precise scheduling, patient tracking, patient notes, nurse-patient assignments, and more. This article shows many ways to use dry erase walls for improving intra-hospital interactions among staff members and patients, thus enhancing a hospital’s overall quality of care, operating efficiency, and staff-patient satisfaction.
Dry Erase Walls take productive meetings to a whole new level of efficiency and effectiveness. Here are ways to organize and conduct a productive meeting in a business office or other setting make up a wide-ranging subject, with numerous books, instructional videos, and even entire organizations devoted to it.
Revolutionizing Brainstorming with Artificial Intelligence and Dry Erase Paint
To remain competitive in today’s
fast-paced, ever-changing business environment, embracing new
technologies such as artificial intelligence (AI) and dry erase paint
is essential. This is especially true when engaging in creative tasks
such as brainstorming ideas for a company project. When a cutting-edge
approach combining these two technologies is used, brainstorming can
become an infinitely expandable process that will benefit businesses,
schools, medical centers, or other organizations where new ideas and
problem solutions need to be generated.
The concept of brainstorming started with a book
The word brainstorming was coined
by advertising executive Alex F. Osborn in his 1953 book Applied
Imagination: Principles and Procedures of Creative Thinking. Since then,
the term brainstorming has spread worldwide and has been given multiple
meanings. The Merriam Webster’s Dictionary defines it as “a group of
problem-solving techniques that involves the spontaneous contribution of
ideas from all members of the group; the mulling over of ideas by one
or more individuals in an attempt to devise or find a solution to a
problem.”
Brainstorming is widely applied in
business, education, and other fields as a powerful strategy for
spawning ideas and working out problems. Traditionally, brainstorming
was done face to face with a group of colleagues in a meeting room,
feeding off of one another’s imaginative insights and arriving at an
agreement about how to implement an idea or a plan of action.
Brainstorming changed radically with the advent of remote meetings
However, as the workplace has
evolved, brainstorming has increasingly occurred remotely through video
conferencing, online chats, or social media platforms. Virtual
brainstorming presents the chance to introduce additional points of view
by including contributors from diverse fields and from any location on
Earth.
But despite their benefits,
virtual brainstorming sessions pose the challenge of keeping all the
participants involved and attentive to what’s going on. It’s much easier
for attendees in remote brainstorming meetings to break away by
mentally tuning out and to multitask by simply turning off their cameras
and muting their microphones.
The importance of artificial intelligence in brainstorming
The tendency of remote
participants to tune out of brainstorming sessions can be greatly
reduced through the use of a generative artificial intelligence (AI)
tool such as ChatGPT. The highly engaging nature of ChatGPT makes it an
ideal partner for brainstorming sessions with human participants. It
allows users to enter prompts and obtain human-like text, images, or
videos generated by the AI tool.
ChatGPT can significantly heighten
the quality of the brainstorming process by giving idea generation a
data-driven slant. AI systems like ChatGPT can quickly analyze enormous
quantities of data, identify relationships and tendencies that humans
may overlook, and offer novel solutions to problems. Such systems can
also produce a wide range of ideas based on a team’s precise parameters,
thus raising the quantity and quality of thoughts developed during
brainstorming meetings. Moreover, AI tools can eliminate bias, as they
present an impartial perspective and help participants center on only
the main concepts related to a given project or question.
Making use of artificial intelligence as a brainstorming tool
In order to receive the most
accurate and relevant responses from ChatGPT, it’s essential to
understand its method of generating ideas and images and to shape
questions accordingly in a process called “prompt engineering.” A good
way to start this process is to regard the AI tool as a conversational
partner in your brainstorming sessions, because its basis is in
language, and it is excellent at engaging in dialogue with humans.
Combine AI with dry erase paint and revolutionize the way you brainstorm
Conventional face-to-face
brainstorming is often referred to as a funnel-shaped procedure,
starting with broad, sweeping discussions of a topic and gradually
focusing on increasingly key ideas. While brainstorming with AI, the
same principle can be applied. The process starts with a
well-thought-out prompt produced by a human or group of humans. This
prompt will bring forth a response from ChatGPT that can then be
modified or redirected to upgrade the content.
Such ongoing iterative interaction
between human beings and the AI tool can bring about enhanced
efficiency and quality of output. To augment the success of this
strategy, dry erase paint is an essential tool for generating a
virtually endless number of prompts, as dry erase wall paint can
transform any flat surface into a limitless brainstorming space.
Similar to ChatGPT, walls coated
with dry erase paint are unlimited in their ability to inspire creative
ideas and images. Writing down many prompts on a dry erase painted wall
will allow the AI tool to give an immense variety of possible responses.
Your team can then whittle these down to determine the best candidate
to use as a prompt for starting a dialogue with ChatGPT. Then, as the
brainstorming session progresses, you can steadily upgrade the content
provided by the AI tool to ultimately reach your project’s goal.
Brainstorming with ChatGPT is all about the prompts
Because so much of functioning
with a program like ChatGPT depends on the prompts you develop, it’s
vital to spend sufficient time and effort on getting them right. And
there’s no better way to refine and optimize your prompts than by
writing down many possibilities on a wall coated with dry erase wall
paint.
Think of ChatGPT as a collaborator
in your brainstorming process instead of a substitute for human
imagination and insight. Also, consider your wall coated with dry erase
paint as an adjunct to this collaborative effort. The important part is
to use the wall effectively to generate prompts that will support the AI
tool in creating responses associated with your team’s goals.
Walls coated with dry erase paint are ideal for generating prompts
Similar to the five Cs of
effective written communications — conversational, clear, concise,
connected, and correct — there are several best practices for writing
prompts on your dry erase painted wall that you can select from to use
with ChatGPT. They include the following:
First, ensure your prompts are clear, concise, pertinent, precise, and inventive.
Second, make certain that they’re focused on the preferred outcome of your brainstorming session.
Lastly, provide context, use an iterative approach, and spell out the precise output format you want to see.
As noted in the third point above,
working with ChatGPT to generate content needs to be an iterative
process, one that requires ongoing human participation and validation.
Each iteration that you go through with ChatGPt can provide you with new
ideas, and may also repeat concepts or themes from previous iterations.
Using your personal background and know-how, you may choose from all of
ChatGPT’s responses to arrive at the best suggestions to meet your
needs, and filter out those that are incorrect or irrelevant.
While producing content with ChatGPT, you can take these steps:
Have the AI tool concentrate on creating storyboards or training outlines for a particular subject.
Analyze the outputs you receive for accuracy and the existence of overlapping topics
Sift through the tool’s suggestions to decide what will best resonate with your target audience.
Such an iterative process often
involves multiple rounds of refinement and evaluation, with each round
building on the previous one as you gradually narrow the focus down to
the most promising ideas or topics.
By using the AI output as a
starting point, you can produce increasingly valuable and relevant
content. Once the outline or storyboard is complete, you can repeat the
process for each specific objective in your project.
Brainstorming with ChatGPt and Dry erase paint will Evolve over Time
When brainstorming, start broadly
and refine your focus by chaining the prompts you generated on your dry
erase painted wall. Your first output may not be perfect, but you can
use it as a starting point and alter the prompts based on the output to
direct the AI tool toward producing increasingly valuable and pertinent
content. Repeating this process over time with the AI tool and your wall
coated in dry erase paint will prove essential to your organization’s
ultimate success.
Applying only one coat of our premium dry erase paint
to your walls will save time and money. After only 48 hours of dry
time, you’ll be ready to use your new attractive whiteboard surface for
various tasks. By installing our one-coat paint, you’ll eliminate
excessive downtime from your daily schedule of work projects, home
school lessons, or other activities. You will also pay for just the
amount of paint you need to produce a highly cost-effective,
long-lasting, and easily cleaned dry erase surface.
Low-quality Dry Erase Paints Typically Require More than One Coat
However, several other brands of
dry erase paint on the market today require a two-coat or even a
three-coat application to make their dry erase surfaces work properly.
This is a significant factor to consider when choosing which dry erase
wall paint to purchase. Two or more coats of whiteboard paint being
required means buying more paint and working twice as long to apply it.
This situation, in turn, means a higher end cost for the consumer with
regard to both time and money.
Most dry erase paint brands that
need multiple coats are epoxy-based. The directions on their containers
frequently state they can cover a certain amount of square footage.
However, the information on the containers usually needs to mention that
two or more coats are needed for the finished dry erase surface to
function as it should. With some of these products, a second coat might
have to be applied immediately, and with others, a 24- or 48-hour
waiting period is needed between coats. Either way, two containers of
paint must be purchased to cover the same area that one container of
premium dry erase paint will cover.
Many of these two-coat dry erase
paints are lower-priced brands, such as those available at home
improvement stores and retail paint suppliers. They require two top
coats if the finished dry erase surface is to be suitably written on and
erased. If only one coat of these products is installed, when the
surfaces are erased, ghosting and smudging are apt to occur. These
problems arise because the coating will need more chemical components in
the finish to be effectively written on and cleaned.
Applying two coats of these paints
will result in more expense for you. And if you hire a professional
painter to install, your labor cost will be twice as high. Also, putting
on two coats makes it twice as likely that your freshly painted surface
will be damaged while drying. Passersby might accidentally touch it or
lint from the surrounding air may more easily settle on it, because the
surface will be wet for twice as long.
Applying One-coat Premium Dry Erase Paint is More Economical
So, the overall cost and
inconvenience of applying two-coat dry erase coatings will be
substantially greater than if you use our premium one-coat dry erase
paint. With top-quality dry erase paint you save the added time and
expense of needing to buy twice the amount of product to cover the same
square footage, along with double labor costs if you hire a professional
painter to do the application. For these reasons, it’s of great benefit
to have a one-coat application.
Proper Preparation and Application are Essential for One Coat to be Effective
That being said, to complete a
successful one-coat installation of top-quality dry erase paint, it’s
critical to follow the instructions supplied with each paint kit
carefully. Doing so will eliminate the need to put on a second coat to
repair any issues caused by a faulty first coat. All problems with
applying premium dry erase paint, such as drips, missed spots, or use of
an improper base coat, such as flat paint, can be fixed with a second
coat. However, a single coat that’s applied over a proper base coat is
all that’s needed to give you a durable and easily erased whiteboard
surface that will last for many years.
However, if you apply premium dry
erase paint directly over a wall covered in flat paint, you will do so
at your own risk, because flat paint is not a proper base coat and
absorbs dry erase wall paint during application. When this happens, not
enough ReMARKable paint will be present on the wall to provide you with
an impermeable dry erase surface. This will, in turn, cause streaking
and smudging when you try to remove dry-erase marker ink from your wall.
Fixing Issues Caused by an Inadequate Base Coat
The remedy for this problem is to
apply a second coat of premium dry erase paint. However, the wall must
be sanded with 220-grit sandpaper because the surface will be slick. In
this case, a light going over with the sandpaper is all needed to scuff
the surface and allow the second coat of dry erase paint to properly
adhere. When sanding your wall, it’s vital to cover the entire surface,
even the edges and corners. Afterwards, ensure the wall is entirely
dust-free by carefully wiping it down with a microfiber cloth. Then, a
second coat of dry erase paint may be applied. When the second coat
dries, the wall will function as it should and be entirely impervious
for dry erase marker ink and dirt.
Past Experience Shows that a Properly Applied Single Coat is All That’s Needed
Many people can’t believe that
applying just a single coat of premium dry erase wall paint is enough to
provide a functional, durable writing surface. But years of experience
applying the coating in offices, schools, company headquarters, health
care facilities, and other venues worldwide prove otherwise.
However, it’s essential to bear in
mind several key factors to achieve a successful one-coat application
of premium dry erase paint:
Make sure that the surface you plan to coat is perfectly smooth and dust-free
Make sure that you use a proper
base coat (a full list of recommended base coats is available under the
company website’s “Whiteboard 101” tab)
Make sure to carefully follow the
manufacturer’s instructions on the suitable types of base coat to use
for your particular application
Be aware that before applying dry erase paint the base coat needs to dry for at least 24 hours, not just overnight
Follow the instructions in the paint kit for adequately mixing the paint, such as don’t shake, stir gently, etc.
Apply the paint as liberally as you can without producing drips or runs as you roll it on your wall
Avoid pushing so hard on your
paint roller that you extract every drop of paint from the roller and
thus apply the coating more thinly than it should be
Just gently, smoothly, and evenly lay the paint on the area where you’re working and then move on to the next area
Avoid stretching the paint and
trying to coat more square footage than the amount of paint in your kit
is designed to cover (e.g., don’t try to make a 100-square-foot kit
cover 150 square feet of wall space)
Use the type of gentle pressure
on your paint roller that you would use to wipe down the countertops in
your kitchen with a dampened cloth
If you follow these basic
guidelines and strictly adhere to the instructions provided with your
dry erase paint kit, you will be assured of a flawless application. You
will also have an attractive dry-erase surface that will last for ten or
more years of continuous use without yellowing, peeling, or cracking.
Since the 1970s, problem-based
learning (PBL) has been one of the most important instructional
strategies teachers use from kindergarten to university. Medical
educators in North America started the technique, which has since spread
worldwide and across various grades and disciplines. Its potential to
enhance student learning has been exploited to great effect, with many
students reporting that PBL is a fun way to learn.
PBL is a student-centered teaching
approach in which learners gain knowledge about various subjects
through group activities to resolve open-ended problems. The problems
provide the driving force that inspires the students to learn and
develop vital academic and career skills such as critical thinking and
project management. PBL is an active teaching technique that promotes
maximum student involvement in learning. It requires teachers to
energize learning scenarios by fostering cooperation among students to
investigate, make decisions, and take action in response to a project’s
challenges.
A Dry Erase Wall is Critical to Success in PBL
PBL also involves using a system
of assessment that fosters awareness, reflexivity, and an analytical
attitude in students, thus smoothing their progress toward deeper levels
of scholarship. To engage in the process of cooperative work in
applying PBL, dry erase walls
are essential tool. When using the method in your classes, students
should be organized into small groups to expand their collaboration
skills. To minimize intra-group friction, urge the students to use the
dry erase wall in an egalitarian way, where all participants have an
equal chance to express their views and post their ideas without fear of
criticism or reprisal.
What Are the Potential Benefits of Problem-Based Learning?
Over the years, several positive
educational outcomes have been associated with PBL. More specifically,
well-designed and executed PBL projects have been shown to enhance
students’ skills in the following areas:
Collaborative work
Project management and group leadership
Verbal and written communication
Personal awareness and self-confidence
Evaluation of group-related processes
Thinking and working independently
Critical thinking and assessment
Explanation of ideas
Self-directed education
Application of course material to real-world situations
Literacy in research and data gathering
Cross-disciplinary problem-solving.
In light of these benefits, it’s
evident that implementing PBL in the classroom is a highly effective
instructional approach for students and teachers alike. A top-quality
dry erase painted wall is a vital tool in implementing PBL projects.
Using Problem-Based Learning in the Classroom
In PBL, instead of following the
traditional instructional pattern of presenting course material and then
having students apply the knowledge they gained to solve problems, the
problems are submitted first for the students to research and solve. PBL
assignments may be brief, lasting for only a class period, or more
complex and take an entire semester to complete. PBL generally involves
collective effort, so it’s helpful to reserve part of your classroom
schedule for getting students primed to work in groups and then give
them enough time to complete their assigned PBL project.
Steps Involved in a Typical PBL Project
When doing problem-based learning activities, students have to complete these steps:
Analyze the data provided by the teacher and clearly define the problem and the criteria for solving it.
Survey what they already know about the issues involved in the problem.
Establish what further information they need to learn and where they can get the data and tools required to solve the problem.
Assess various possible methods for solving the problem.
Go about solving the problem after choosing the best method(s)
Provide a report on their conclusions to the teacher and class.
Using Your Dry Erase Wall for Problem-Based Learning
To use your dry erase wall as a tool for PBL projects, follow these procedures:
Draw four large equal-sized sections on your dry erase wall with a dry erase marker and a ruler or yardstick.
Within each section, create four vertical columns of equal size.
As the header above the far left-hand section, called the “Problem Analysis Section,” write “Clearly Define the Problem.”
At the top of the first column in
this section, write “What are the criteria for a successful conclusion?
(Here, the students determine the decisive factors for successfully
solving the problem.)
At the top of the second column,
write “What do we know about the problem?” (Here, the students list the
facts they know about the problem.)
At the top of the third column, write “What do we need to learn?” (This question is what drives the PBL process.)
At the top of the fourth column,
write, “Are there any assumptions we must make?” (This question relates
to any ideas that will skew the results of the problem-solving process
one way or another.)
Then move on to the second
section on your wall, and as the header for this section, write
“Independent Research.” (Here, the students set learning goals and
divide the problem-solving tasks among themselves.)
Draw three columns within this section.
At the top of the first column,
write “Divide up the learning. Who will do what?” (Here, the students
write their names and the tasks they assign for themselves.)
At the top of the second column, write, “How much time do we have to complete the research?”
At the top of the third column, write, “What is our optimum plan for reaching the objectives we set?”
Next, move to the third section
on the wall and write “Brainstorming” as the header. (This section is
used after the students independently research possible solutions to the
problem and then come together again as a group.)
Below this header, draw four
columns marked “Solution Ideas,” “Pros,” “Cons,” and “Ranking.” (Here,
the students brainstorm various solutions, discuss and record the pros
and cons of the solutions, vote on the solutions, and then rank the
solutions.)
Finally, move to the fourth
section on the wall and write “Solution Testing” as the header. (Here,
the top-ranked solution is tested against the criteria for a successful
solution listed earlier in the Problem Analysis section.)
After setting up your dry erase
wall like this for a PBL session, generate a problem for your students
to solve, ideally a real-world condition or circumstance similar to a
challenge they may face in their present lives or their coming lives or
careers. An example would be devising a new scheduling system for the
students’ school.
Conducting the PBL Session with Your Dry Erase Wall
After the dry erase wall is set up
with the required sections, headers, and columns, begin the PBL session
by explaining the project’s preferred learning outcomes. What new
knowledge might the students gain or new skills might they acquire as a
result of participating in the project? Familiarize the students with
the nature of group processes and have them do warm-up exercises so they
can practice discussing and assessing their work and the work of their
peers as part of the project.
Then, inform the students that the
first step in solving any problem is problem analysis or clearly
defining the problem. After discussing and establishing the precise
nature of the problem they need to solve, the students can write it down
in the column marked “Clearly Define the Problem.” Then they should
follow the other steps of determining the criteria for a successful
solution, deciding who will do what tasks, and so on. Depending on the
nature of the project, it might be necessary for the students to assume
various roles, such as those of government authorities, corporate
executives, or the like.
The completed sections on the dry erase painted wall
will record the problem-solving process for you and your students. For
this reason, taking pictures of the sections for reference when doing
related classwork and subsequent PBL projects is a good idea. Also,
inform the group how you will evaluate and grade the assignment.
Consider making the students conduct the self and peer assessments as
part of their PBL project grade.
If you think you know all the places where you can install top-quality dry erase paint,
you may need to think again. When you’re searching for a handy,
attractive dry erase surface for a special function or in a particular
locale, there are unlimited options for you to choose from.
In many of our other blogs, we’ve
presented information on the most traditional areas to apply premium dry
erase paint, namely walls. Still, countless more unique and
out-of-the-ordinary surfaces exist for your use. You need to get
creative and “think outside the box” to give yourself new and unusual
ways to record information, get creative with art, or just doodle to
relieve daily stress on a dry erase painted surface.
The places described below may not
suit the needs of every business office, school, private residence, or
other venue. Still, you might find a new and inventive way to use dry
erase wall paint that makes your space more functional and attractive.
This article offers tips on unique
surfaces in your business, residence, school, or other location where
dry erase paint may be applied for an infinite range of practical and
recreational uses.
Room Dividers Offer Ideal Surfaces for Writing and Drawing
In most people’s minds, the installation of top-quality dry erase wall paint is associated only with walls in
offices, classrooms, private homes, and other spaces. However, the
possibilities are endless when it comes to the variety of different
surfaces and locations you can apply the paint for writing, drawing, or
doodling.
For example, large, smooth
vertical surfaces such as room dividers are perfect for producing text
and drawings during group brainstorming sessions and for carrying out
shared work activities such as group project planning and management.
They’re also great for conducting events like conferences, seminars, and
training workshops with larger groups of people.
As supplements to your dry erase
walls, room dividers are excellent places for applying premium dry erase
paint, as they offer large, smooth canvases similar to walls and are
easily accessed and used by anyone in the room. For even more writing
areas, horizontal surfaces such as office table tops, low cabinets,
credenzas, and office desks may also be painted for activities such as
individual meetings and one-on-one brainstorming sessions that don’t
need everyone on the team to be involved.
The Refrigerator Door is a Handy Writing Space for Useful Information
When you coat your refrigerator
door with premium dry erase paint, your kitchen area becomes an
easy-to-access communications hub that allows for the writing of memos
to family members, inspirational quotes to uplift your spirits, weekly
grocery lists, the day’s dinner recipes, and more. Converting your
fridge this way eliminates the need to post notes and lists on easily
lost bits of paper with tape or magnets. Once your refrigerator door is
covered with dry erase wall paint, you can write in large letters and
quickly erase the content with a few swipes of a microfiber cloth when
the data is no longer needed.
The ability to write in large
letters and numbers on your fridge door’s dry erase painted surface will
make it easy to leave attention-grabbing messages about essential
appointments, memos to family members, homework, household chores that
need to be completed, and other topics that your household should be
aware of and remember.
Your Kitchen Island Counter Can Take On a Host of New Functions
Add a stand-alone island to your
kitchen decor and customize it to accommodate your specific needs and
taste. You can significantly enhance the look and functionality of your
home cooking area. You may install a freestanding stationary island or a
mobile one for greater flexibility. The traditional kitchen island is
rectangular, with one section often used as a handy breakfast counter.
Your kitchen island can be a breakfast and meal-prep area, a convenient
storage unit, or even your kitchen’s primary work and communication
center.
Too frequently, island counters
just become surplus fixtures in the kitchen. Instead of merely
encumbering this vital room in your house with an item of cabinetry
that’s never used, why not transform it into the centerpiece of your
kitchen activities? These days, kitchen islands usually contain
integrated cabinets that provide household members with extra storage
space and allow the countertops in the kitchen to be used for different
purposes. But why not make your kitchen island even more useful for
daily household functions?
One unique way to do so is to coat
the countertop with premium dry erase paint. Doing so will allow you to
create a handy place to jot down recipe ingredients and cooking
directions, keep track of grocery items that need to be purchased, leave
notes for family members, and much more.
If you want a highly serviceable
kitchen island counter, you need to maximize it to perform multiple
functions, such as using it for cooking and baking and as a storage
area. For the latter function, you can use dry erase paint to coat the
drawer fronts and cabinet doors for listing the contents and other
relevant information.
Kitchen Cabinets are Ideal for Putting up Information
The doors of your kitchen cabinets
and counter drawers can easily be transformed into highly accessible
dry erase painted surfaces for listing their contents and recording
other helpful information. Cabinet doors can also be excellent
supplements to your dry erase painted refrigerator door as places to
input family activity schedules, errands to be run, kids’ after-school
activities, and more. By using the unique and handy magnetic hanging
system called GoodHangups, you’ll also be able to post your children’s
drawings and paintings, graded exams and essays, class grade reports,
and other items that will encourage the youngsters in their school work
and artistic efforts and thus improve their self-esteem and image.
Why Not Use Dry Erase Painted Panels at Large Family or Business Events?
One of the most unique ways to use
premium dry erase painted surfaces is to incorporate them into wedding
receptions, family reunions, and other large family or business
gatherings. To do so, you can coat large plywood or particle board
panels with dry erase paint and then use the panels for posting the
event’s seating plan for the guests to check, along with other
information such as arrows and text indicating the right direction to go
to get to the event.
In case you need to make sudden
changes, the easy erasability of premium dry erase painted surfaces
makes revising information like seating arrangements quick and
effortless. Also, when creating seating arrangements, you can use
various colors of dry erase markers to categorize the different types of
guests who will be attending an event such as a wedding reception.
Typical categories of guests to be
seated include the bride and groom, the parents/siblings/grandparents,
the wedding party, the children, and high school friends. A seating
arrangement that features an overview of all the guests and their
designated tables can be made to fit many different wedding themes, such
as romantic, vintage, whimsical, rustic, art deco, and garden party or
casual. Find a friend, family member, or relative who is adept at
calligraphy and has a steady hand to create an attractive and elegant
seating chart on your dry erase painted panel to impress all of your
guests.
Having an array of dry erase
painted panels at wedding receptions, family reunions, large birthday
parties, business gatherings, and other such events is a fun, exciting,
and novel way to keep attendees informed about important information and
to add a touch of uniqueness and visual appeal to the proceedings as
well.
Dry erase walls
have become indispensable tools in the arsenal of modern architects.
Architects design and develop ideas for structures and turn these
concepts into graphic images and plans, ultimately becoming homes,
schools, office buildings, and other facilities. The jobs of architects
involve more than just a building’s appearance, and almost all parts of
their work are visual by nature. Architects consult with clients to
ascertain their needs and prepare drawings and specifications of the
concepts that the clients want to see realized. Periodic meetings are
held with clients and other professionals, such as engineers, to discuss
and develop design proposals and move them toward completion.
For this reason, architects need a surface to work on in developing
designs and presenting their design ideas without worrying about running
short on drawing space. Standard writing and drawing surfaces like
framed whiteboards and flip charts need to be bigger to meet the needs
of most architects for creating building designs and displaying them at
meetings. With access to a dry erase painted wall, however, an architect can draw large sketches of one or more buildings without being concerned about lack of room.
This article discusses how architects can make efficient use of dry erase walls
in the building design process and in displaying their ideas at
meetings with clients and other professionals working alongside them on
projects.
Designing Buildings with Event Planning in Mind
In the past 20 years,
architectural design has attained new levels of sophistication and has
left a mark on the event planning industry. Architectural projects can
transform community sections into social and meeting hubs, making event
planning easier. In designing an environmentally and pedestrian-friendly
multi-building complex, architects can create vibrant centers for
holding large events such as banquets, dinners, conferences, and
concerts.
Dry erase painted walls are
invaluable tools in creating designs for such projects. With their huge
surfaces, dry erase walls offer the chance to generate rough ideas for
many buildings and other structures in a complex all at once. In this
way, event planning can be more easily included as a key factor to be
considered in an overall project design. The “big picture” of a complex
of buildings can be seen in a larger format than would be possible on
the limited surface of a computer screen or traditional whiteboard. This
way, visualizing a wide range of options for designing buildings
conducive to planning and holding events becomes a trouble-free task.
Doing Collaborative Project Management Activities
Besides architects, many types of
professionals, such as civil and mechanical engineers and quantity
surveyors, play vital roles in executing construction projects on
schedule. Architects are often chosen to be project managers (PMs) among
these individuals. The role of a PM is to ensure that a project is
implemented within a specific budget and time frame. An architectural
project manager, known as an ArPM, manages all of the steps involved in
the design and construction of a building.
These steps range from developing
and assessing building design plans to ensuring that a project adheres
to local and national environmental and safety guidelines. A large,
easy-to-use dry erase wall can be a vital tool in this process, as it
allows for quick and easy writing of text such as lists of government
guidelines and drawing of graphics such as architectural design plans.
Facilitation and Improvement of the Planning Process
A recent study showed that among
the many hurdles an ArPM faces in executing a construction project are
inadequate planning and improper scheduling.
Dealing with these difficulties
can be made much simpler by using a large user-friendly dry erase
painted wall. For instance, adequate planning of projects is facilitated
when the vast canvas of a dry erase wall is available for posting
planning ideas and giving them a quick swipe of a microfiber cloth to
make changes. In this way, project planning can become a free-flowing
process with endless possibilities for the creative assignment of duties
and flexibility in adjusting priorities when needed.
Improved Collaboration with Other Professionals and Clients
What’s more, during the process of
project development, a quantity surveyor, who makes sure that the
construction work is completed within budget, is also needed. For this
reason, ArPMs need to meet regularly with quantity surveyors to discuss
the progress of a building project and its costs. For clients, a clear
understanding of the development process is essential, so architects and
quantity surveyors need to work together to guide clients through the
intricacies and issues related to their project. This is another place
where dry erase walls can come in handy, as they allow for
easy-to-understand presentations to clients of design progress by
architects, along with details on budget and time factors by a quantity
surveyor.
Easy Production and Modification of Building Layouts or Floor Plans
Typically drawn to scale, a
building layout or floor plan can be a simple two-dimensional diagram or
a graph drawing showing the basic arrangement of the rooms in a
building from an aerial perspective, including the dimension lines, room
measurements, and spatial relationships among objects and fixtures. A
floor plan provides a builder or designer with a physical scenario to
look at and evaluate and acts as the preliminary representation for an
architectural design project.
Floor plans may also reveal
possible flaws in a design, eventually serving as the starting point for
drafting definitive final blueprints for the building.
The process of drawing floor plans
may be smoothed along by using a dry erase painted wall. The wall’s
colossal surface area can provide more than enough space to generate
large-sized preliminary layouts easily altered by erasing and redrawing.
The large drawings will be easy for clients to view and comment on
during meetings. Then, once a plan is reached that meets the clients’
needs, pictures can be taken of the images to serve as the basis for
more detailed designs to be drawn up later.
Schedules for the Completion of Construction Projects
Besides providing dates for
construction activities, project scheduling is designed to match
equipment, labor, and material resources with work tasks that occur over
time. Careful scheduling can avoid issues related to production
holdups, assist in the prompt acquisition of materials, and otherwise
guarantee that a project is completed on time and within budget.
The Critical Path Method Helps to Facilitate Project Completion
Using a dry erase painted wall,
an ARPM can easily carry out project scheduling and make changes as
often as needed. The most commonly used construction project scheduling
technique is the critical path method (CPM). In this approach, the
shortest completion time for a project is calculated beforehand, along
with likely starting and finishing times for various project-related
activities.
Computer representations of a
project schedule typically comprise a list of activities along with
their durations, requisite resources, and antecedent activities.
However, rather than lists, graphic representations are more beneficial
for visualizing a construction plan and ensuring its mathematical
constraints are met. This is another area where dry erase painted walls
come into play.
In the critical path approach,
data from the project’s list of activities along with identifiers for
the various types of activities to be performed may be entered onto a
large schematic diagram or flow chart on the wall. The diagram should
consist of nodes (circles, squares, or ovals) tied together by lines or
arrows representing the sequence between the activities. This technique
is referred to as the activity-on-node (AON) or precedence method and is
widely used worldwide. Architects working as ArPMs can more easily
complete their construction projects on time and within their budgets
using the AON critical path approach on a dry erase wall.
Due to the chemical structure of their ingredients, epoxy-based dry
erase paints are susceptible to a type of discoloration known as
yellowing or “ambering” when they’re exposed to ultraviolet (UV) light
for some time. Even when chemicals called UV light stabilizers are added
to their ingredients, epoxy-based coatings still turn yellow with time
and require removal and recoating, especially when more severe problems
arise, such as delamination (fracturing into layers), peeling, loss of
surface sheen, and chalking, or the formation of a powdery layer on a
coating’s surface. In contrast, our quality dry erase paint
is composed of a highly durable, flexible, and waterproof two-part
water-based aliphatic polyurethane formulation, which, unlike
epoxy-based dry erase paints, is highly resistant to UV radiation, and
so is not subject to yellowing or the other problems common to epoxies.
Epoxy-Based Dry Erase Coatings and Yellowing
Like most other materials on Earth, epoxy resins such as those used
in many of today’s dry erase paints change when subjected to ultraviolet
light from the Sun or other sources. Even the UV light from seemingly
harmless fluorescent lights can produce changes in epoxies, the most
obvious being a form of discoloration known as ambering. When rays of
ultraviolet light from the Sun or artificial lights shine on an
epoxy-based dry erase coating, they gradually damage the complex
chemical compounds known as polymers in the coating’s resin, producing a
yellow or amber hue on the formerly pristine dry erase surface. Even
epoxy-based dry erase coated surfaces that are initially crystal clear
and transparent or pure white (if zinc oxide is part of the ingredients)
will inevitably and sometimes quickly take on an unsightly-looking
shade of yellow.
Initially, yellowing appears as a light hue over the entire dry erase
surface and then gradually deepens till it attains a darker
brownish-yellow color. Indoor epoxy-based dry erase coated surfaces
typically start to yellow in six to twelve months after they’re applied,
even if they’re composed of paints containing a UV-stabilizing chemical
additive because such additives only slow down the pace of yellowing
but cannot prevent it. This color change is unavoidable because epoxies,
which belong to a group of organic compounds known as aromatics, are
unable to resist the effects of ultraviolet light.
This quality of powerlessness against the impact of ultraviolet light
is known as being “UV active.” The molecules of UV-active chemicals
need strong atomic linkages, which is common in aromatic compounds like
those contained in epoxy-based dry erase coatings. While epoxy resins
have excellent chemical and physical qualities, their toughness and
functioning are severely lessened by the action of UV light on their
chemical structures, so yellowing, cracking, and loss of durability are
bound to happen. Oxygen radicals are formed as oxygen molecules in the
atmosphere are subjected to ultraviolet light. These unstable molecules
contain oxygen and react easily with other molecules, so they readily
attack and react with the surfaces of epoxy-based dry erase coatings,
causing yellowing and the other problems mentioned above.
Thus, while they have good chemical resistance and electrical
properties, good adhesion to metals, and good resistance to water and
physical shock, epoxy resins are highly susceptible to UV light damage,
so their durability is greatly lessened when they’re exposed to sunlight
or even artificial radiation from fluorescent lamps and other sources.
In other words, epoxy resins can’t resist the impact of ultraviolet
light on their original color and appearance. In fact, epoxy-coated
surfaces have even been known to undergo yellowing when they’re kept in
total darkness.
UV Light Stabilizers Delay the Inevitable
Many epoxy resins currently on the market contain UV light
stabilizers to guard against the problem of ambering or yellowing, along
with the other issues that epoxies are susceptible to, such as
delamination (fracturing into layers), peeling, loss of surface sheen,
and chalking, which is the formation of a powdery, easily crumbled layer
on the surface of a coating, usually caused by exposure to ultraviolet
light or other forms of energy. Epoxy resins that are continually
subjected to ultraviolet light are also prone to cracking, which, in the
end, leads to failure and the need to remove the degraded coating and
recoat completely.
For these reasons, UV light stabilizers are necessary additives for
epoxy-based dry erase coatings. They are generally effective, except for
yellowing, which the additives can delay for a time but can never be
eliminated. Silicone-based epoxy resins have better UV-light resistance
than other types of epoxies, but they come at an extremely high price
and are thus cost-prohibitive for most customers. So, when choosing a
dry erase coating, buyers need to be aware of and avoid products like
epoxy-based dry erase paints containing aromatic compounds that yellow,
and eventually experience other problems leading to failure, including
delamination, chalking, peeling, and cracking.
Superiority of Top Dry Erase Coating’s Chemical Structure
As discussed above, epoxy resins contain aromatic molecular groups
that strongly absorb light in the ultraviolet range of the light
spectrum, putting their chemical structures at high risk of being
degraded by such light. The light stability of epoxy resins may be
improved by including additives known as UV stabilizers or UV
inhibitors. Still, epoxies will never reach the same level of
ultraviolet light resistance as that possessed by aliphatic acrylic
urethane formulations, such as those of our premium clear and white
ReMARKable dry erase coatings, which retain their bright, sparkling
appearance for ten-plus years of continuous writing and drawing, if
properly cleaned and maintained with microfiber materials and a
water-based dry erase cleaner.
Aliphatic acrylic polyurethanes like those in our premium dry erase
coatings are composed of multiple straight chains of urethane, a
synthetic crystalline chemical compound with tremendous strength and
elasticity. The molecular forces in polyurethanes are spring-like and
feature strong attractions, causing polyurethane compounds to be highly
flexible, tough, and long-lasting. Coatings like our high-end dry erase
paints made from polyurethanes like aliphatic acrylic urethane typically
have high tensile strengths and molecular bonds, so they continue to
hold up even under extremes of temperature and physical stress. These
qualities make our top-quality dry erase paints appropriate for
application in all environments and withstand long-term use with the
proper care and maintenance.
Top-quality Dry Erase Coatings Resist Yellowing
All paints yellow to varying degrees when exposed to ultraviolet
light; however, since our premium dry erase coatings are not epoxy-based
but instead are aliphatic acrylic urethane formulations, they’re among
the most light-stable of all dry erase paints on the market today.
Therefore, while some yellowing may occur with our coatings, it is so
subtle that it’s not visible to the naked eye and requires special
laboratory equipment to detect, so it doesn’t affect the appearance of a
finished dry erase-coated surface. The aliphatic nature and excellent
light stability of our premium dry erase paints, and the UV-inhibiting
chemicals they contain make our products about as light stable as
possible at the current research and development stage in dry erase
paint manufacturing.
Aliphatic refers to organic compounds in which carbon atoms form
straight open chains, as in polyurethane, not aromatic rings, as in
epoxy resins. This quality of having open-chained atoms makes aliphatic
urethane products like our premium dry erase coatings resistant to
ultraviolet radiation and, in turn, to yellowing and the other problems
epoxies are prone to. In aromatic compounds such as those in epoxy-based
dry erase paints, the carbon atoms are joined in a ring structure,
making almost all such compounds susceptible to changes caused by
ultraviolet rays from the Sun and artificial lighting. So, when choosing
a dry erase coating for your office, school, private home, or other
venue, it’s wise to go with ReMARKable, an industry leader with a tough,
long-lasting urethane formula that will never yellow, crack, or peel
for its entire lifespan.
Every room in the house, school, business office, or other venue is a potential spot for applying top-quality dry erase paint. The information in this video will give you some practical pointers where whiteboard paint can be installed and ideas for how dry erase surfaces may make your life and those of your family members, students, and coworkers more convenient and enjoyable.
Applying top-quality dry erase paint differs from the way traditional latex wall paint is applied. It involves specific techniques to ensure you achieve a perfect installation and experience ten or more trouble-free years of regular use when your dry erase surface is properly erased and maintained. Some significant factors to consider when making your application are discussed in this article.
Top-quality dry erase painted walls
are perfect for increasing productivity in business offices, retail
shops, and other commercial settings, and they can be just as effective
in the home. Since they offer durable, convenient writing surfaces for
countless household applications, dry erase walls can make family
interactions smoother and thus help activities and tasks get done on
time and with greater efficiency. Here are some of the many ways dry
erase surfaces can increase your family’s productivity by offering a
simple, effortless means of communication for everyone to use.
Create Easily Updated Family Grocery Lists
Converting one of the walls in your kitchen, family room, or other
space into a dry erase surface can be helpful for writing down family
grocery lists. There you can record items to be purchased along with the
quantities and brands your household prefers. Anyone can add to the
list when they find that the pantry or fridge is out of stock on certain
items or if they want to buy specific foods or beverages. A dry erase
wall in the kitchen can also be a handy place for family members to
write ideas about favorite meals to prepare and recipes for foods they’d
like to enjoy someday.
Post a Schedule of Daily Household Chores
A dry erase painted wall is also an excellent substitute for the
refrigerator door to post schedules of daily chores. To enhance your
family’s productivity in completing chores, a list of regular
assignments is a must-have tool. And the vast surface of a dry erase
wall allows you to write in large letters that can be viewed by
everyone. Having a schedule of daily tasks posted on the wall makes it
easy to rearrange or revise the household agenda by simply erasing
inaccurate or out-of-date entries and posting new information when
needed. Also, with a daily chore schedule displayed in big letters on
the wall, your family will feel more motivated to be productive. Because
if specific tasks are left undone, others in the household may notice
the omissions and remind those responsible to do their duty.
Remember Appointments with a Dry Erase Wall Calendar
You can also create a highly visible and easy-to-use appointment
calendar on your wall. As every efficient manager knows, calendars are
essential for keeping track of appointments in business offices,
healthcare facilities, and other busy locations, and this is equally
true for the home environment. A large calendar displayed on a dry erase
wall makes tracking appointments much easier. You can add notes to your
calendar about upcoming engagements and quickly erase and update
entries when needed.
Coordinating your daily appointments with the assistance of a dry
erase wall calendar will help you stay focused on your most important
activities and keep your mind at ease. Also, compared to the small
confines of a paper calendar or a calendar on a framed whiteboard, a dry
erase wall calendar has many advantages.
For example, the large surface area of a dry erase calendar allows
you to input all of your essential appointments in big, easily read
letters and numbers. And if you need to make a revision, you can quickly
erase an entry and write in the updated data. Also, by creating an
hourly schedule, you can plan your appointments from the beginning to
the end of each day; and just like with a weekly calendar, if an
appointment needs to be postponed or canceled, you can promptly move it
to another time slot or delete it entirely. As an option, you might even
want to create a one-year calendar, for which dry erase walls are
perfect, as their large size allows you to input and delete long-range
appointments with ease.
You can create your calendar using a ruler or yardstick and a roll of
colored electrical tape, washi tape, or 1/8″ auto pinstriping tape (if
you want to have thinner lines). Pinstriping tape is generally available
at online retailers or your nearby auto parts store. Just draw the
template for your calendar with a low-odor dry erase marker and a
yardstick and then carefully apply the tape over your pre-drawn template
using the yardstick as a guide.
Do Your Special Occasion Planning with a Dry Erase Wall
Whether you’re organizing a small birthday gathering for the kids or
orchestrating a significant occasion with many guests, like a wedding or
family reunion, event planning is a huge undertaking. All types of
events, no matter how simple or complex, require meticulous preparation
and management to be successful. From calculating a budget to arranging
the activities, a dry erase painted wall can be your best friend and
helper as you plan for and work on the fine points and logistics.
It’s essential to take the following steps early in the planning
process to make working on your event as hassle-free as possible. Define your goals Calculate your budget Seek the help of family members and friends Choose the location and date Create engaging invitations Plan the program of activities Confirm who will be attending Arrive early n the day of the event and make sure everything is in order. In
this process, your dry erase wall can come in handy for defining your
goals, calculating your budget, listing potential helpers, brainstorming
locations and dates, designing invitations, planning the activities,
and listing potential attendees.
Create a Medication Schedule to Maintain Family Health
Having a dry erase painted wall in your home makes it easy to create
and update a medication schedule for family members to follow. On the
large canvas of your dry erase wall, you’ll be able to clearly display
the precise times when medications or supplements need to be taken,
along with how much to take. In this way, you’ll help avoid dosage and
timing errors and enhance intra-family communications to prevent memory
lapses and potential health issues.
After creating your medication schedule, you can input each dose to
remind yourself and others of times and amounts and thus ensure regular
consumption. Taking multiple medications daily can get confusing, and
mistakes or forgetfulness can have serious medical consequences. So, be
sure to use your schedule to keep track of all your family’s required
medications and supplements. You might also take a picture of the
schedule to share with doctors and emergency personnel.
A Bill Payment Schedule Can Help You Manage Debts
Keeping track of when to pay your bills each month can be
challenging, especially if the bills are due on different days. However,
you can easily remember your due dates if you create a payment schedule
to survey all of your bills and whether or not you’ve paid them. Creating
a checklist on your dry erase wall makes it simple to keep your
household bill-paying process on track and done in a timely manner. Just
write the list on your wall so that it’s readily available at all times
to refer to when household bills are due. Having the checklist written
out in large letters and numbers on your dry erase wall is much handier
than keeping a list on an easily lost piece of paper in a checkbook or
folder.
Handle Children’s Schedules with a Dry Erase Kids’ Calendar
Children’s schedules are among the trickiest parts of family life to
organize, but if you use a dry erase kids’ calendar to keep everything
straight, your days will flow much more smoothly. A kids’ calendar that
suits everyone’s needs may seem undoable, but coordinating various
schedules and transporting the children to their sports practices and
games becomes a snap when you create a giant calendar just for the
children on your dry erase wall. Just make the kids’ calendar according
to the directions presented above for the household calendar, and make
sure that each child has an assigned color of dry erase marker ink to
keep them sorted out when you read their entries.
The large attractive surfaces of top-quality dry erase painted walls
are perfect decorative additions to various parts of your home’s
interior space, from the kitchen to the kids’ room, to the garage, to
the living room. Besides their eye-catching appearance, dry erase walls
in your residence can also provide many other benefits, such as smoother
communication among family members and more significant opportunities
for creative expression and practical activities for both kids and
adults.
What’s more, premium dry erase paint may be applied to other surfaces
in your house, such as the refrigerator, the pantry door, dresser
drawers, the kitchen countertops, the workbench, the dining table, and
the home office desk. Below are some creative ideas for ways to decorate
and provide useful communication tools all around the house with
premium dry erase paint.
Dry Erase Paint Your Refrigerator to Create a Communications Center
Your refrigerator can take on a whole new identity as a
communications center that allows for large, easily seen text and
graphics to be posted and then erased when they’re no longer needed.
Gone will be the need to put up notes and lists with magnets on small
pieces of paper. When your fridge is coated in top-quality dry erase
paint, you can write in big letters and easily change the content with a
few swipes of a microfiber cloth. The chance to write in large letters
on the fridge’s dry erase surface will make it easier to leave
attention-grabbing messages about essential appointments, chores that
need to be done quickly, and other topics that your family members need
to know about and not forget.
Make a Childhood Whimsy Wall in the Children’s Room to Inspire Creativity
If you install top-quality dry erase paint in the kids” room, they
may be inspired to produce a large-scale art wall or “whimsy wall” and
have a lot of fun while enhancing their artistic skills in the process.
Dry erase walls tend to bring about an immersive, engaging, and mentally
stimulating experience for kids, so the original artwork they produce
on their whimsy wall is sure to be highly innovative and one-of-a-kind.
Having the kids express their whimsical, youthful natures on the wall
can promote creative ability that will be useful in their school work
and in other parts of their daily lives both now and in the future.
After the children fill their dry erase whimsy wall with art, you can
take pictures of their creative efforts to show to relatives and
friends and to remind the kids of the great work they did. In this way,
you’ll enhance their innate creativity and boost their confidence and
self-esteem in dealing with academic life and other challenges.
Make a Dry Erase Household Chore Chart to Motivate Your Family to Work
A clear, easy-to-read chart listing all of your family members’
regular chores is simple to make on the large canvas of a dry erase
painted wall. Such a chart will be a key element in helping your
household run smoothly and in keeping both interior and exterior areas
clean and well-organized.
The Master Household Chore Chart
Begin making your household chore chart with a master list of tasks
that need to be done, and then break the list down into individual lists
for each member of your household, using a different color of dry erase
marker ink for each person. In this way, you can employ color coding to
more easily keep track of everyone’s designated duties and divide up
the chores evenly so that no one family member has an excessive amount
of work to do to keep your house or apartment in tip-top shape.
On the master list of family chores, write down all of the work to be
done around the house and how often individual tasks have to be
completed. The list ought to include both outdoor and indoor jobs that
must be accomplished on a daily, weekly, monthly, and even yearly basis.
If you prefer to use a pre-formatted document as a guide for this
purpose, you can search the internet for household chore checklists. On
these extensive online lists, you might notice tasks that you forgot to
put on your master chore list but that do need to be done regularly.
Daily, Weekly, Monthly, and Yearly Chores
With respect to chores that should be completed every day, you can begin by listing items such as the following: Washing dishes Dusting Sweeping Vacuuming Recycling Cleaning bathrooms Feeding animal companions Doing laundry Preparing meals Weekly, monthly, and yearly chores should also be listed in this way on your dry erase wall. Weekly duties might include: Mopping the floors. Taking out the trash. Watering the house plants. Weeding the garden. Next,
you should list monthly tasks such as cleaning windows, bathing animal
companions, and vacuuming the drapes. Finally, yearly jobs such as
winterizing the house and pruning trees and shrubs should be listed.
Individual Household Members’ Lists
When you feel that you’ve finished forming your master chore list,
you can begin erasing items from that list and moving them over to
smaller individual lists for the various members of your household. In
dividing up the master list, it’s essential to keep in mind the ages and
capabilities of your various family members so as to avoid placing
overly high expectations on any one person. It would be best if you also
thought about splitting some chores into smaller tasks that can be done
by children who may not be able to carry out the whole job.
Dry Erase Paint Your Pantry Door for Multipurpose Use
You could also apply the white or clear version of premium dry erase
paint to a pantry door to provide your family with an easily accessed
surface for writing notes, making shopping lists and calendars, listing
kids’ pick-up times, leaving appointment reminders, and posting a host
of other information. In this way, combined with your dry-erase painted
refrigerator, your kitchen will become a multi-use communications hub
and creative space for the household that motivates the family to do
their chores, reminds everyone of important dates, and offers a showcase
for your family’s creative thoughts and images.
Dry Erase Paint Your Dresser Drawers and Closet Doors for Labeling
Dresser drawers and closet doors in your bedroom are also helpful
surfaces to coat with top-quality dry erase paint so you can organize
your clothes and remind yourself of where various items are located. On
these surfaces, you can label the contents and also note outfits, shoes,
and accessories that you want to wear on specific days or for special
occasions. In addition, these surfaces could be handy for writing down
clothes, shoes, and other items that you want to have dry cleaned or
repaired, to pass on to others, or to contribute to charity.
Dry Erase Paint Your Bar, Countertop, Work Bench, and Dining Table
The sky is the limit when it comes to the practical applications of
premium dry erase paint. So, besides the above-mentioned surfaces, you
can transform a countertop, a workbench, a bar in the den, a room
divider, a dining room table, or virtually any other smooth flat surface
into an attractive canvas for writing messages to family members,
note-taking during phone calls, and numerous other uses.
In addition, if you choose to create a dry erase look other than
white, you can apply the clear version of premium dry erase paint to a
surface as long as the original color is light enough to write on
legibly with a low-odor dry erase marker. In the kitchen, you can paint
the tabletop with white dry erase paint to hide the table’s dark wood
tone, and so create a paperless work and play area for all of your
family members to use and enjoy.